Make the Bag Body
The bag body is shaped with box corners, and has a ruffled panel on the front that conceals a zipper pocket.
Attach the Interfacing
The first step is to iron the medium-weight fusible interfacing to the wrong side of the bag body.
Tip: when using fusible fleece, I find that the fleece fuses better and looks better if you first add some interfacing to the fabric. Very often, if you don’t fuse the fleece properly the first time, it can create wrinkles on the outside of the fabric which look awful and are difficult to remove. Adding some interfacing first helps to stabilize the fabric and give it a slightly stiffer hand which makes fusing the fleece easy.
You can use a light-weight interfacing, but for Phoebe I chose a medium-weight interfacing which also helps to add more shape to the bag while the fleece keeps it soft.
Attach the Outside Zipper Pocket
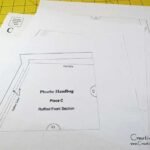
Iron the medium-weight fusible interfacing to the wrong side of the outside zipper pocket and using a pencil, transfer the zipper placement markings on pattern piece #A to the wrong side of the outside zipper pocket.

Using the marking on pattern piece #A as a guide, with right sides facing, position the pocket 1″ down from the top edge of the bag body and pin in place.
Note – the zipper pocket on the front of the bag is off-center to make sure it fully hides underneath the ruffled panel.

Sew along the zipper opening stitching line. Using a small pair of sharp scissors, cut along the zipper opening cutting line. Snip into the corners as close as you can without cutting the stitches.

Turn the pocket to the inside through the opening, and press the opening with an iron.

Tip: To make it easier to turn the pocket, it helps to reduce some of the bulk caused by multiple layers of stabilizer. An easy way to remove fusible stabilizer is to hover a steam iron over the section you want to remove, give it a shot of steam, then quickly separate the stabilizer from the fabric using the dull end of a seam ripper.

Then using small sharp scissors, cut away the section being careful not to cut into the stitches.

Center and position the 9″ zipper on the inside along the opening. You will need to unzip the zipper to position the slider. Pin in place.

With the right side facing up, sew the zipper in place stitch close to the edge of the opening. Move the zipper slider as needed, to make it easier to sew.

Cut away the excess zipper at both ends.

With right sides facing, fold the bottom of the pocket up and align the raw edges at the top. Pin in place. Sew a 1/4″ seam along the left side, the top, and the right side.

Attach the Fusible Fleece
 Place the fleece, fusible side facing up, and butt the two ends together. Using a wide zig-zag stitch, sew the butted ends together.
Position the fleece with the fusible side facing down and centered on top of wrong side of bag body. Pin in place around the edges. Turn the bag body so that the right side of the fabric is facing up, and iron the fusible fleece in place.
Tip: It’s easy to stretch fleece out of shape when you’re fusing it. The easiest way I have found to fuse large pieces of fleece is to take the time to pin it to the fabric first. Then fuse the fleece in place by pressing using an up and down motion – not ironing which is a backwards and forwards motion.

Attach the Ruffled Panel
Using a fabric marking pen, transfer the “bottom placement” and the “ruffle fold” markings onto the right side of the bag body. Align the bottom of the ruffled panel with the “bottom placement” markings and pin in place.

Sew the bottom of the ruffled panel to the bag body 1/2″ up from the bottom edge. Ease the stitching at the point where the panel pivots.
Tip: the bottom of the ruffled panel pivots slightly upwards to compensate for the shape of the bag when it’s assembled. When sewing this section you may need to “ease” the stitching, which means to push or pull the fabric slightly so that it’s not stretched out of shape or puckers too much. I sewed slowly, stitch by stitch, and used the point of my seam ripper to adjust the fabric as I went. This pivot is not sharp so it’s not too difficult to sew.

On the right side of the ruffled panel match the “ruffle fold” markings to the markings on the bag top and pin in place. On the left side, pull the thread to make the gathers and arrange so the folds are even. Pin and baste the gathers in place.

Use a few small hand stitches to hold the folds in place. This will make it easier to attach the buttons.

With right sides facing, fold the bag body in half matching raw edges along the top and sides. Pin the side seams. Starting 1/2″ down from the top, sew the side seams.
Tip: To make sewing easier, use a walking foot or an even-feed foot to sew over the gathers.

Remove the basting stitches from the gathered side. Press the side seams open.
Note: It will be difficult to press the seams open on the side with the gathers. Instead, press the seam toward the back.
Tip: Before pressing the seams open, remove some of the bulk from the side seams by cutting away the stabilizer using the same method as explained above for the zipper pocket. This helps the seams to lay flatter.

Pressing Tip: Pressing bags, and seams in bags, that have an unusual shape can be challenging so having the right tools can make the job so much easier. For pressing these odd shapes, I use a seam roll and a tailor’s ham. The seam roll is the perfect shape for pressing side seams – slip it into the bag and hold it firmly as you press the seams open with an iron. The ham larger and is perfect for pressing bag bodies.

Fold each of the side seams to match the raw edges along the bottom. Sew the seam.

Turn the bag body right side out and press.

Coming up Next
In the next session we’ll sew the lining.
The Phoebe SewAlong
1. Welcome
2. Gather Your Supplies
3. Prepare the Pattern and Cut the Pieces
4. Make the Ruffled Panel
5. Make the Bag Body
6. Make the Lining
7. Make the Bag Top
8. Assemble the Bag


