This tutorial is presented using Photoshop Elements and I use floating documents so your workspace may look different. You can activate floating documents in the “General” section of the Preferences panel in Photoshop Elements.
Textured and decorative framed edges for your photos, can really set the mood and turn your photos and images into something memorable, don’t you think?
There are lots of different ways to add textured edges to your photos using Photoshop or Photoshop Elements, but the easiest way I’ve found is to make a separate image and use it as an overlay mask. Using this technique you can accumulate a very nice library of textured edges that you can use over and over on your other photos as well.
This tutorial demonstrates the basics of making this type of textured edge using the basic round brush that can be found in the brush library, and once you know how to do it you can go crazy using other different types of brushes.
Let’s go …
Choose a photo and open it in the workspace. I’m using one of my photo art images.

Alongside the photo, make a new file with a white background the same size and resolution as your photo. This will become your overlay mask. Save the file with a name such as “overlaymask”.
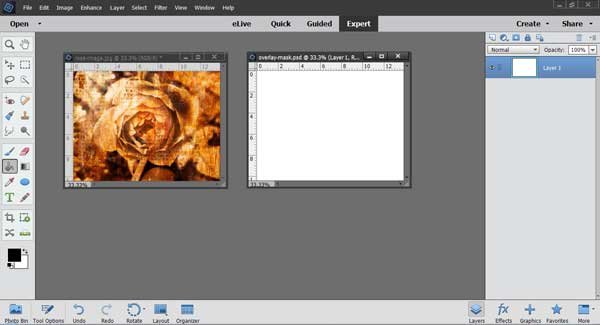
Working on the “overlaymask” file, make a new layer on top of the first layer, set the foreground color to black, click on the Paint Bucket Tool and fill the top layer with black.
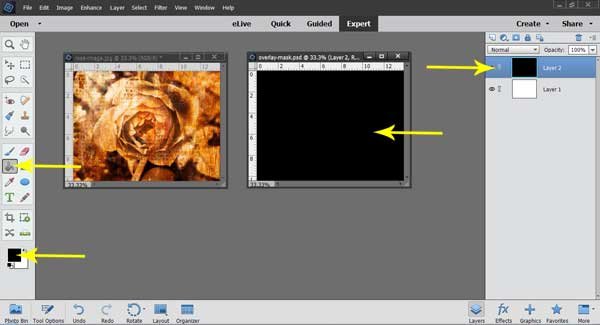
Select the eraser tool, then select a brush from the Default Brush set. I’ve selected a soft round brush and set the size to 200px and an opacity of 100%. You might need to use a different size depending on the size of your image.
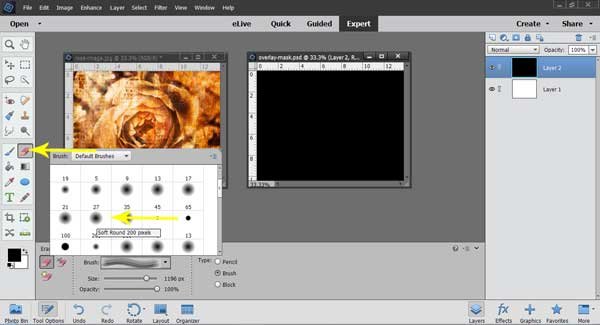
With the black layer selected, run the brush unevenly around the edges to remove some of the black edge.
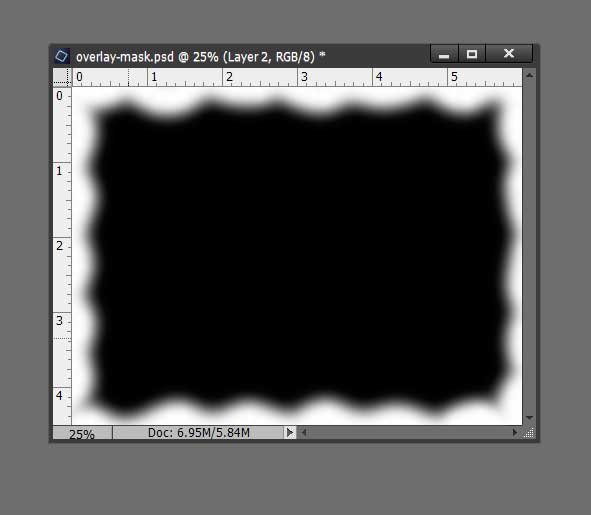
Once you’ve finished removing the edges, you can add some additional decoration by then selecting a brush that has flourishes or swirls, and stamping them onto the black layer using the eraser tool, or the brush tool with the foreground set at white. If you don’t yet have a library of brushes, you’ll find some lovely free brushes at Obsidian Dawn.
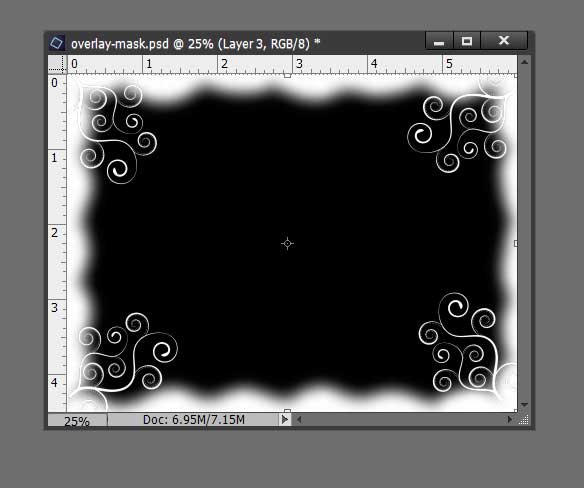
Once you’ve finished adding the additional decoration, right click on the top layer and select Flatten Image.
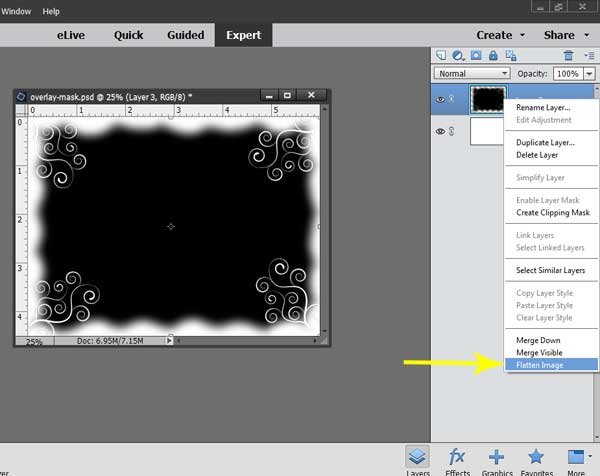
The two layers are now combined into one.
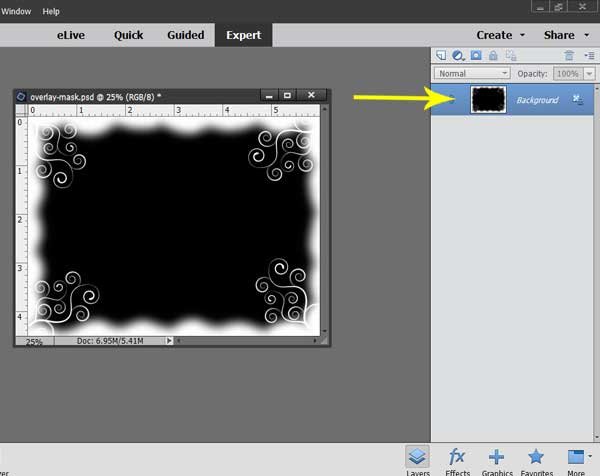
Drag, or copy and paste, the black and white overlay mask and position it on top of the photo. The photo should now have two layers, the black and white overlay mask on top and the photo underneath.

Save and close the “overlaymask” file. On the main photo, select the layer with the black and white overlay mask and from the blend mode drop down box, select Screen.

And magically, the black center of the overlay mask disappears allowing the image underneath to show through, leaving the white edges intact.

The Screen Blending Mode looks at each channel’s color information and multiplies the inverse of the blend and base colors. The resulting color is always a lighter color. Screening with black leaves the color unchanged. Screening with white produces white. The effect is similar to projecting multiple photographic slides on top of each other.
You can also adjust the opacity of the overlay mask which changes the transparency of the white edge. The transparency on this overlay mask has been set to 80%.

These are some other edges I made using the same process but with different types of brushes.


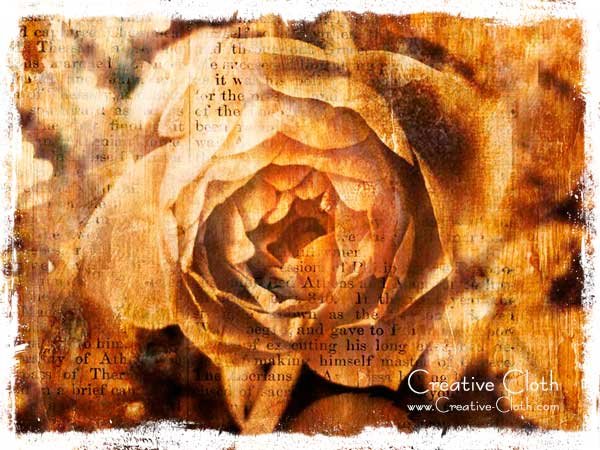
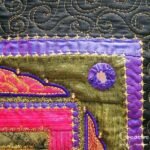
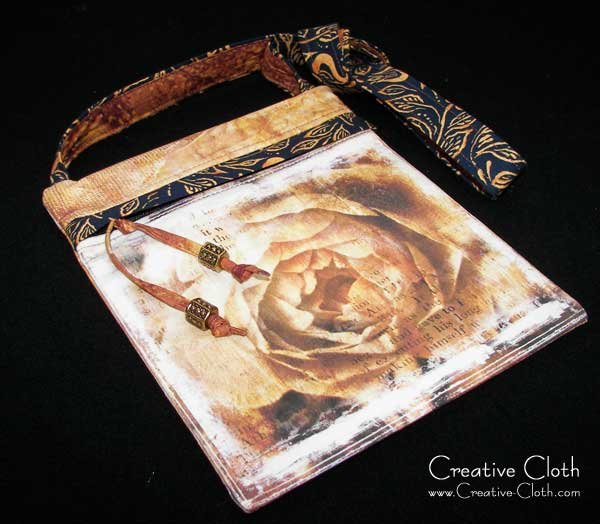
I used a version of this photo art image to print onto fabric to make this shoulder purse.
Have fun and happy photoshopping!
Resources
Find more recommendations in the Resources Section

