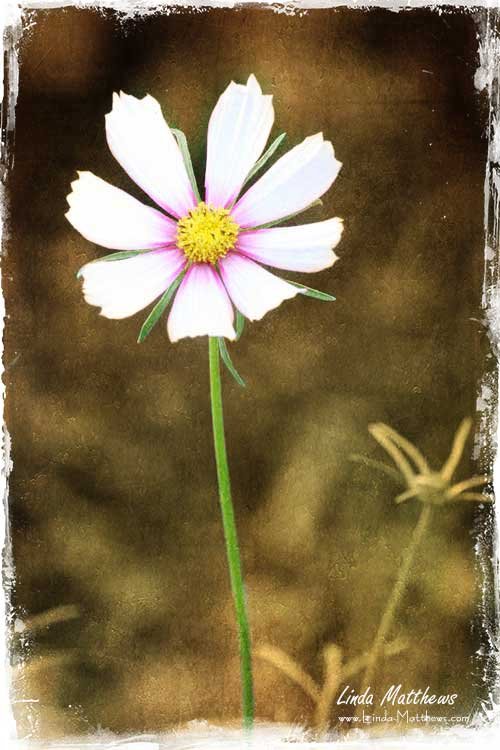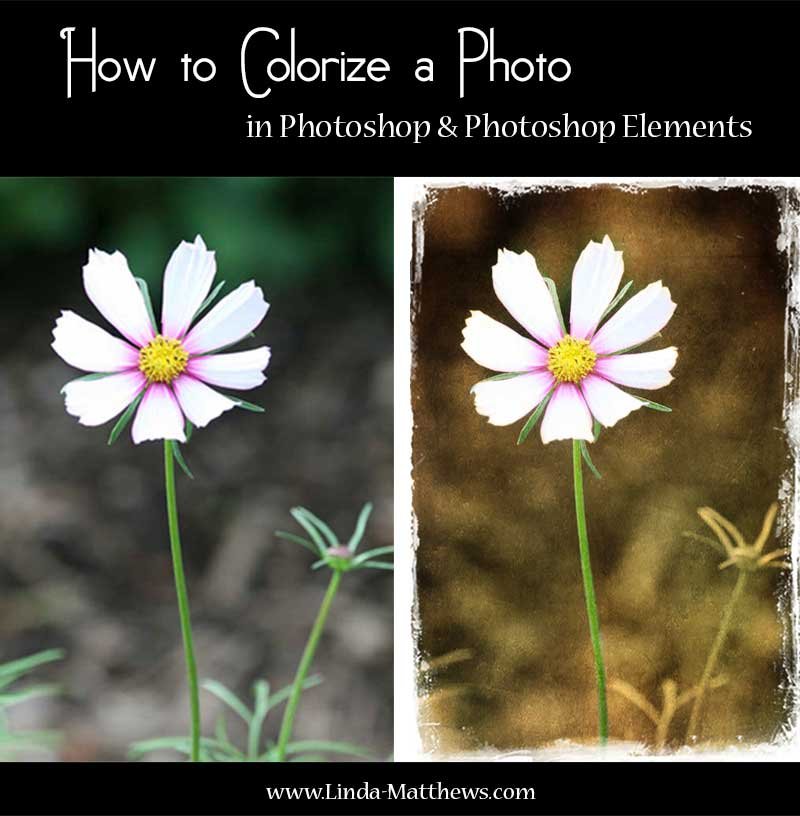
There are lots of different ways to colorize a photo in Photoshop and Photoshop Elements, and the techniques used depend on whether your original photo is in color or black and white. In this tutorial I’ll show you how to take a color photo, desaturate it, and then colorize parts of it. This is a great technique for highlighting areas of a photo or creating a vintage style photo.
I use Photoshop CC which is included as part of the affordable Adobe Creative Cloud Photography Plan.
If you’d like to follow along you can download the original image here.
Click on the layer in the Layers panel to select it, then use keyboard shortcut Ctrl J (Win) or Cmd J (Mac) to duplicate the layer. Click on the copied layer in the Layers panel to select it.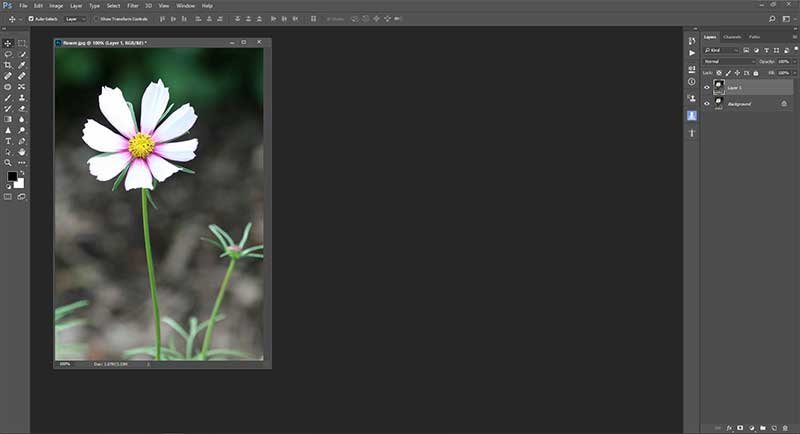
Now we’re going to desaturate the photo and turn it into black and white. From the main menu select Image > Adjustments > Desaturate.
(PSE: Enhance > Adjust Color > Remove Color).
Or simply use keyboard shortcut Ctrl Shift U (Win) or Cmd Shift U (Mac).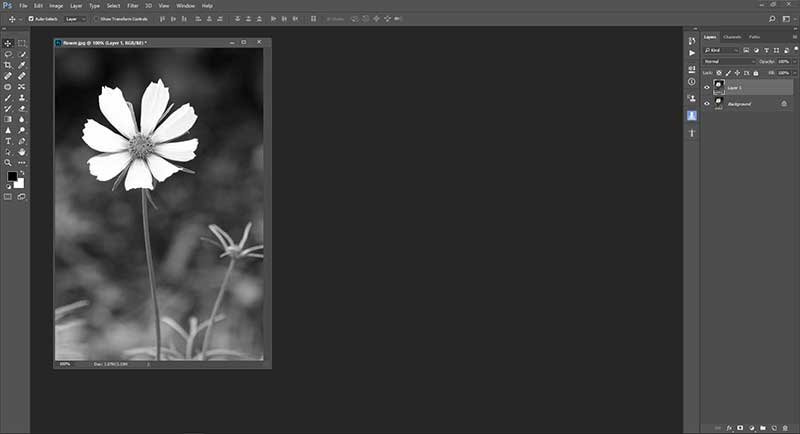
You could use this black and white image, or to make it look more interesting, add a sepia tone. From the main menu select Image > Adjustments > Photo Filer. Adjust to 100%.
(PSE: In the FX panel select Styles > Photographic Effects > Sepia).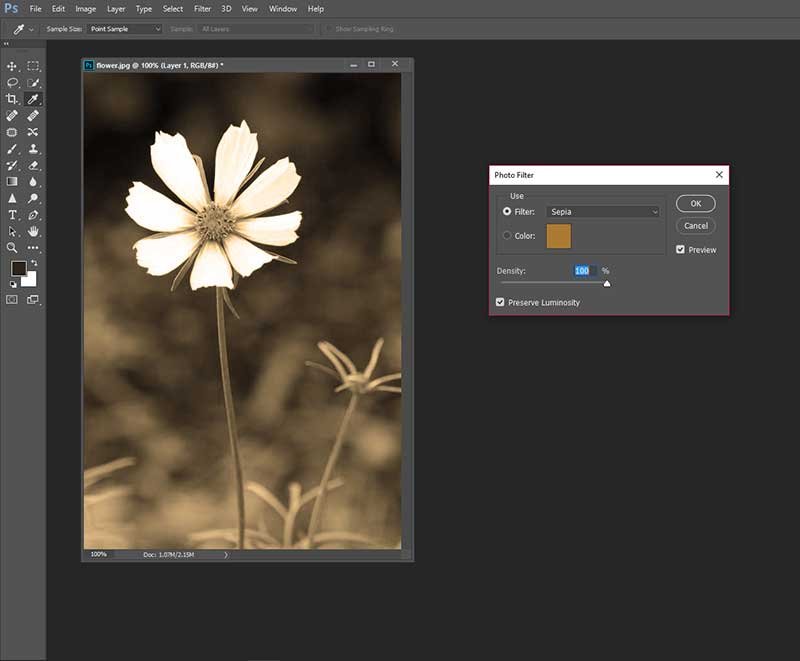
Add a layer mask to the sepia layer. Select the brush tool and a soft round brush and resize the brush if necessary.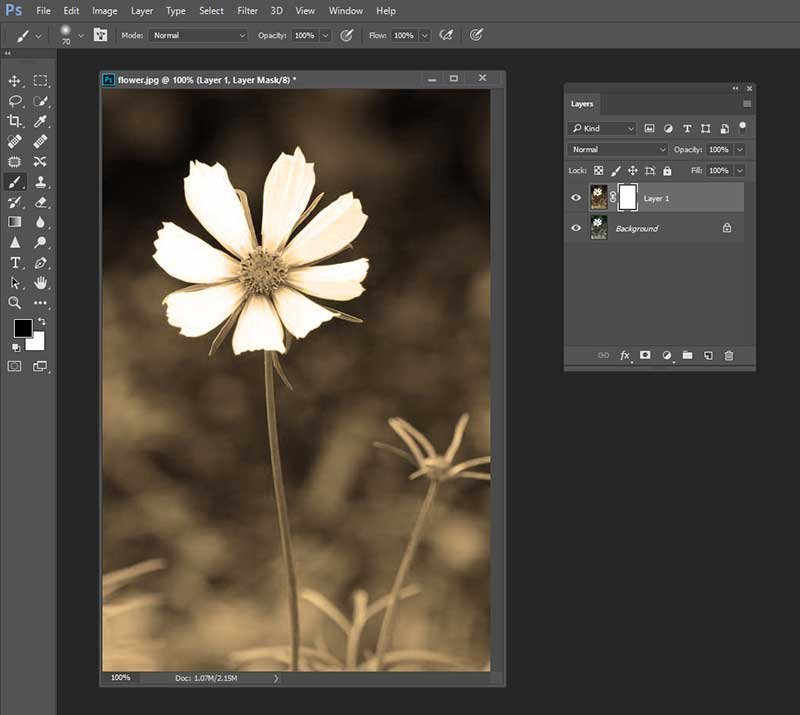
Click on the layer mask to select it. You’ll know that it’s selected because there will be a border around it.
Now on the main image, carefully brush over the areas where you want to add the color back in. I’ve recolored the complete flower including stem.
If you look at the layer mask now you can clearly see the shape of the flower and stem. Using the color black to paint over an area on a layer mask, hides that particular shape on the layer it’s attached to, and reveals the shape of the layer below.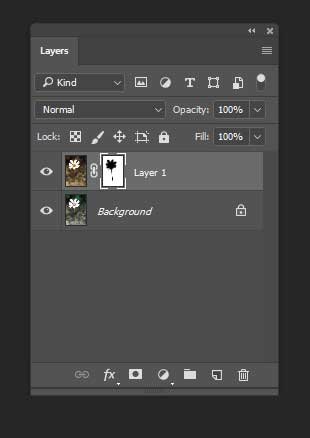
How very easy was that? And look how beautiful the little flower is. Especially after you add a texture or two.