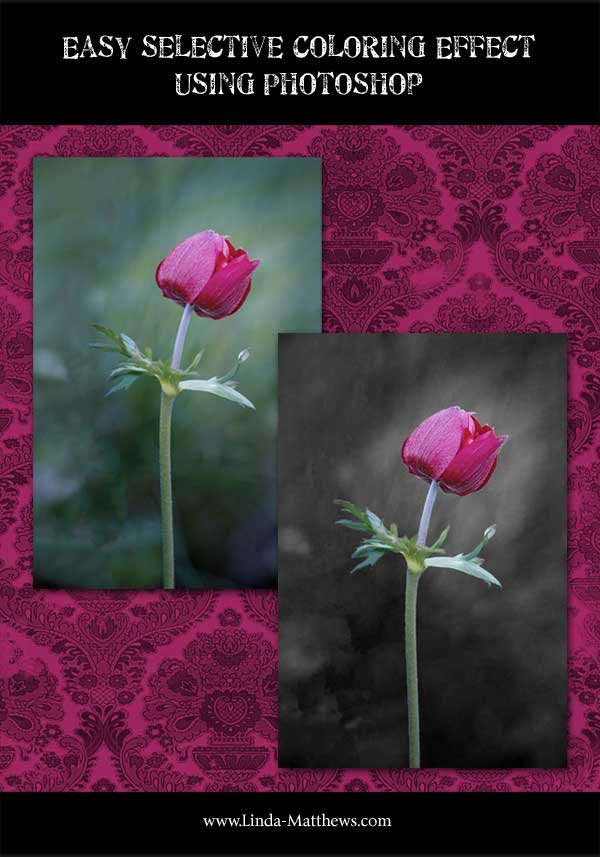
Isolating colors in your photos can be used to add a pop of color to areas of a photo that you want to emphasize. By turning part of the photo into a black and white image, the colored portion stands out in contrast. This is a quick and easy technique to achieve using an ordinary color photo.
This tutorial is presented using Photoshop CC which is included as part of the the Adobe Creative Cloud Photography Plan. However you can also achieve the same effect in Photoshop Elements. I’ve added notes where the instructions are different.
Let’s Begin
Open your photo in Photoshop.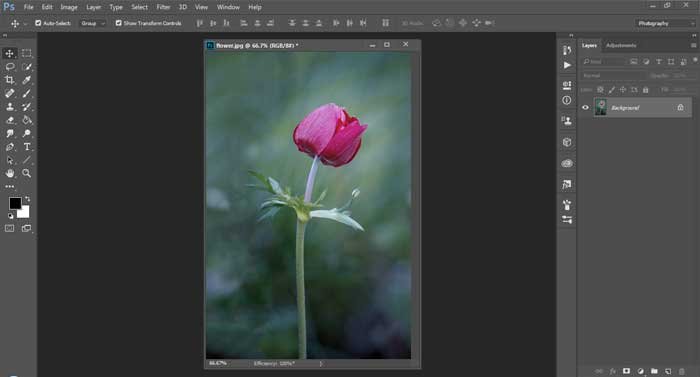
Using the Quick Selection Tool, select the area where you want to retain the color.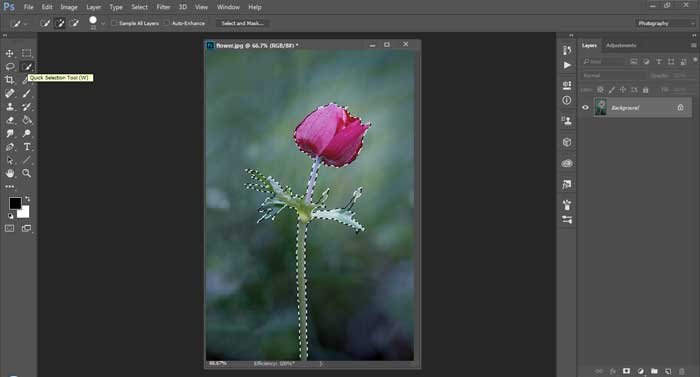
Once you’ve made your selection, now you need to invert it. From the main menu click Select > Inverse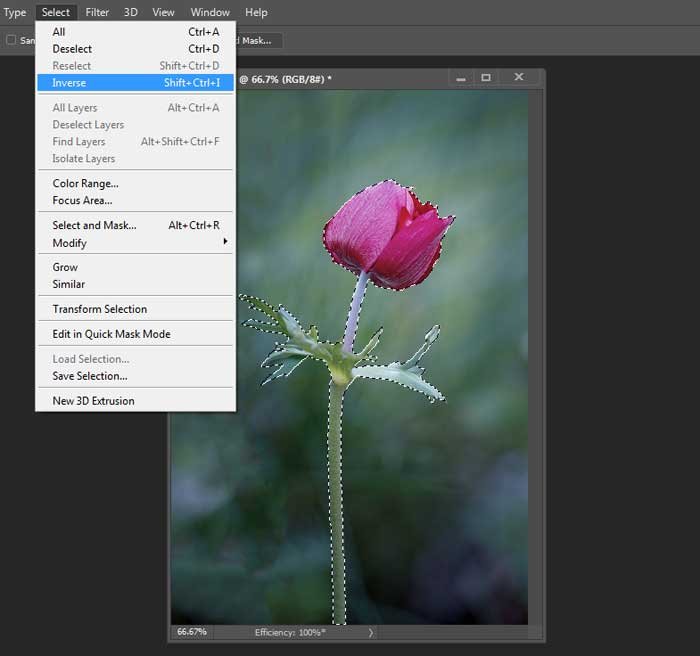
Now you can see that the area that was previously unselected, has now been selected. This is the area that we’re going to convert to black and white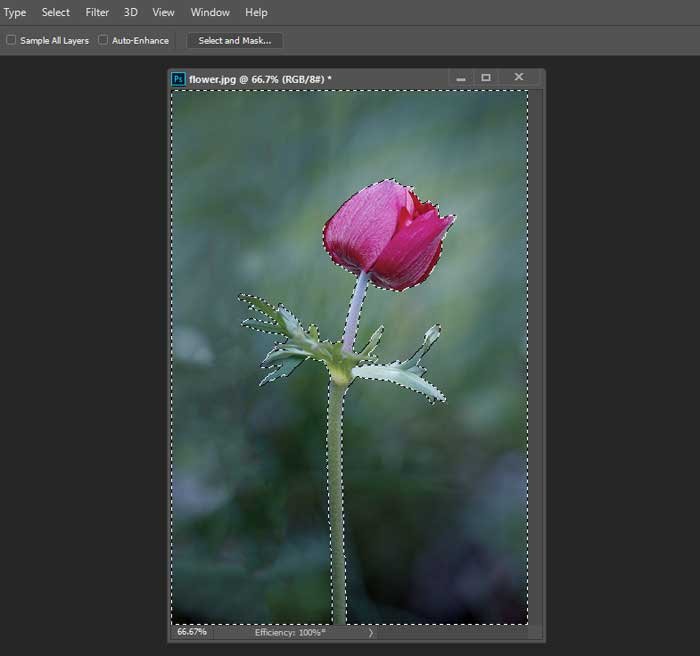
Click the “Create a new fill or adjustment layer” icon at the bottom of the layers palette, and select Black and White. (For Photoshop Elements, from the main menu select Enhance > Convert to Black and White)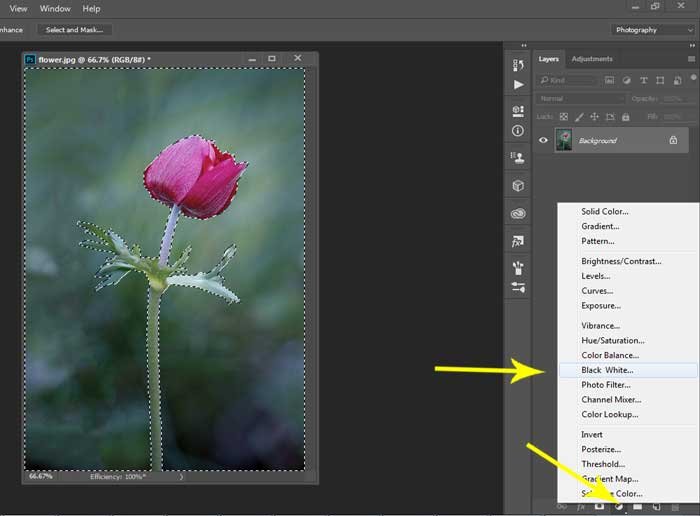
This creates a Black and White adjustment layer above the main image and turns the background to black and white. Using the sliders on the control panel, you can make further adjustments if necessary.
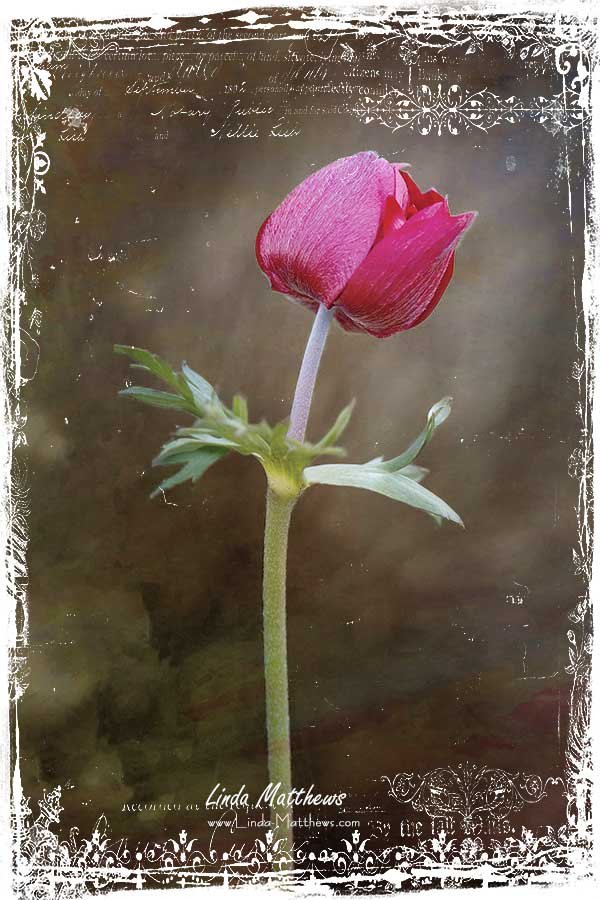
To take this further and create a beautiful piece of PhotoArt, you could also add a texture on top and apply a blend mode such as Soft Light, which changes the background completely.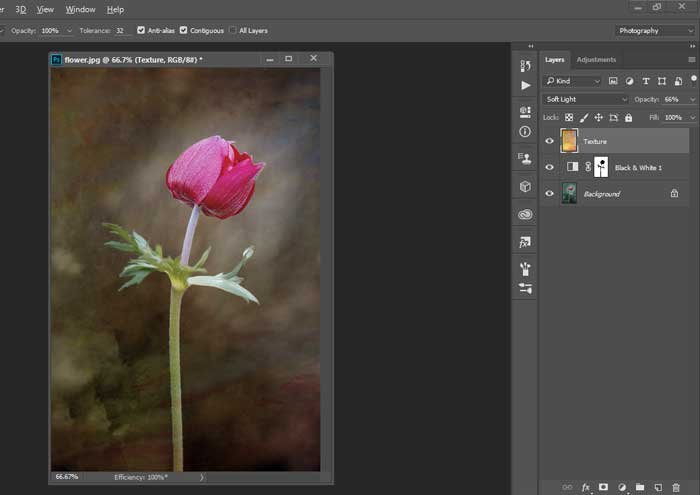
And finish it off with a black and white mask set to Screen blend mode.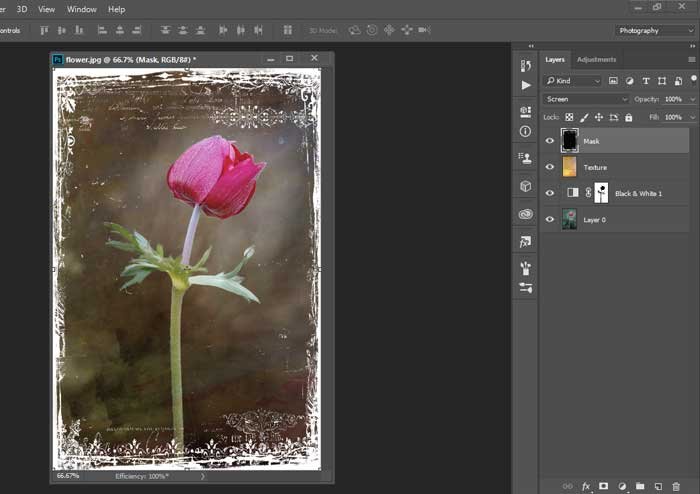
A simple but beautiful piece of PhotoArt.